Quick Answer: What Is Tini’s Mac and Cheese Recipe?
Tini’s mac and cheese recipe is a viral baked pasta dish made with cavatappi, heavy cream, evaporated milk, and a blend of sharp cheddar, Colby Jack, and mozzarella. Bake it at 375°F for 25–30 minutes until golden and bubbly. For the creamiest texture, use freshly shredded cheese and let it rest for 15 minutes before serving.
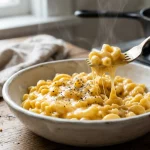
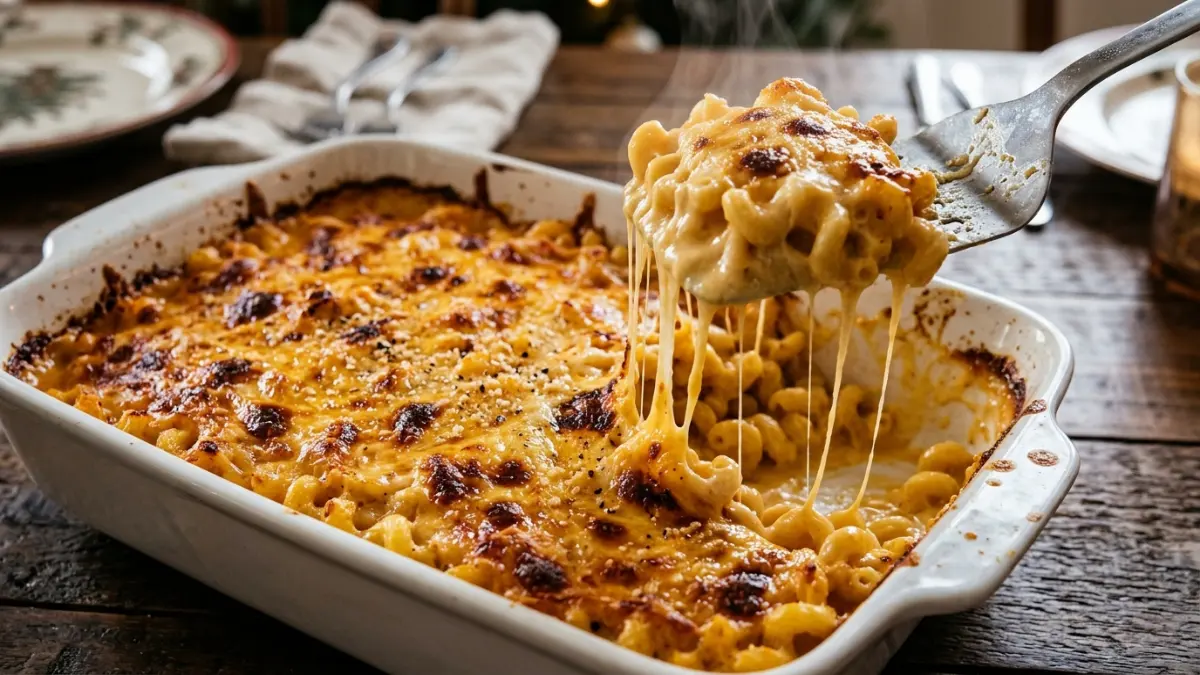
Tini Younger’s viral mac and cheese recipe is famous for its creamy, velvety center, layers of melted cheese, and golden, bubbly crust. Made with cavatappi pasta, a rich evaporated milk and cream sauce, and a blend of sharp cheddar, Colby Jack, and mozzarella, this baked macaroni and cheese delivers rich flavor and a satisfying cheese pull in every bite.
Whether you’re preparing a holiday dinner, hosting a family gathering, or craving homemade comfort food, this recipe makes a delicious centerpiece. Follow the step-by-step instructions below to learn how to prepare the cheese sauce, layer the pasta, and bake it to golden perfection.
Recipe Testing & Provenance Note: This recipe is based on the creator-published formula attributed to Tini Younger. It has not been independently tested in our kitchen.
The Recipe
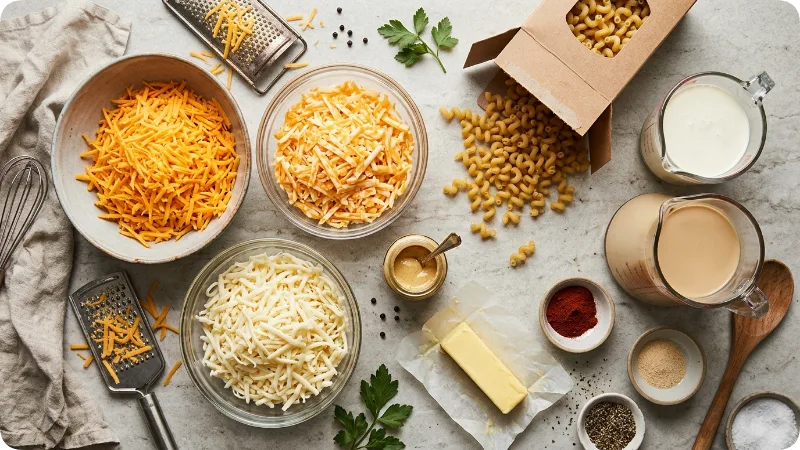
Ingredients
Pasta & Seasoning Blend
- 16 oz (1 lb) cavatappi pasta (uncooked)
- 1 tbsp kosher salt (for pasta water)
- 1/2 tsp kosher salt (for cheese sauce)
- 1/2 tsp freshly ground black pepper
- 1/2 tsp garlic powder
- 1/2 tsp smoked paprika
- 1/4 tsp onion powder
- 1/4 tsp cayenne pepper (optional, for subtle heat)
Cheese Selection (Block Cheese Only, Freshly Shredded)
- 16 oz sharp cheddar cheese, shredded and divided (roughly 4 cups)
- 16 oz Colby Jack cheese, shredded and divided (roughly 4 cups)
- 8 oz low-moisture whole-milk mozzarella cheese, shredded and divided (roughly 2 cups)
Roux & Mornay Sauce
- 1/2 cup (1 stick / 4 oz) unsalted butter
- 1/2 cup all-purpose flour
- 3 cups heavy whipping cream, warmed slightly
- 1 can (12 fl oz) evaporated milk
- 2 tbsp Dijon mustard
Equipment Needed
- 9×13-inch ceramic or glass baking dish (minimum 3-quart capacity)
- Box grater or food processor with shredding disc
- 6- to 8-quart stockpot (for boiling pasta)
- Large Dutch oven or heavy-bottomed saucepan (3- to 4-quart capacity, for sauce)
- Whisk and heat-resistant silicone spatula
- Colander
Timeline
- Prep Time: 25 minutes (primarily shredding cheese)
- Cook Time: 45 minutes (15 minutes stovetop sauce, 30 minutes baking)
- Resting Time: 15 minutes
- Total Elapsed Time: 1 hour 25 minutes
- Yield: 10 to 12 hearty side-dish servings (approx. 1 cup per serving)
Step-by-Step Instructions
1. Prep Equipment and Grate Cheese
Preheat your oven to 375°F (190°C) with an oven rack positioned in the middle third. Lightly butter the interior of a 9×13-inch baking dish. In a large bowl, combine the shredded sharp cheddar, Colby Jack, and mozzarella. Toss lightly to blend. Divide this cheese blend into two equal portions:
- Portion A (roughly 5 cups): Reserved for melting directly into the warm roux to form the mornay sauce.
- Portion B (roughly 5 cups): Reserved for layering inside the pasta and blanketing the top.
2. Boil the Pasta
Bring 4 to 5 quarts of water to a rolling boil in a large stockpot. Add 1 tablespoon of kosher salt. Add the cavatappi pasta and cook for 7 to 8 minutes stopping roughly 2 minutes short of package al dente instructions. The pasta should be firm with a distinct chew at the core, as it will continue cooking in the oven. Drain thoroughly in a colander. Do not rinse the pasta; the residual exterior starches help the sauce cling.
3. Prepare the Seasoning
In a small ramekin, stir together 1/2 teaspoon kosher salt, black pepper, garlic powder, smoked paprika, onion powder, and cayenne pepper. Set aside.
4. Build the Roux Base
Melt the unsalted butter in a heavy-bottomed Dutch oven over medium heat. Once the foaming subsides, sprinkle in the all-purpose flour. Whisk continuously for 1 to 2 minutes until the mixture turns pale blond, bubbles gently, and smells faintly nutty. Do not let the flour brown; this is a light blonde roux meant for thickening rather than deep flavor.
5. Whisk Liquids and Seasonings
Gradually stream in the evaporated milk while whisking constantly to prevent lumps from forming. Slowly pour in the heavy cream, continuing to whisk until the liquid is smooth and homogeneous. Whisk in the prepared spice blend and the Dijon mustard.
6. Thicken the Cream Base
Reduce the heat to medium-low. Simmer the liquid gently, stirring constantly with a silicone spatula across the bottom and corners of the pot, for 3 to 5 minutes until the sauce coats the back of a spoon. Do not let it reach a violent boil.
7. Melt the Sauce Cheese (Off Heat)
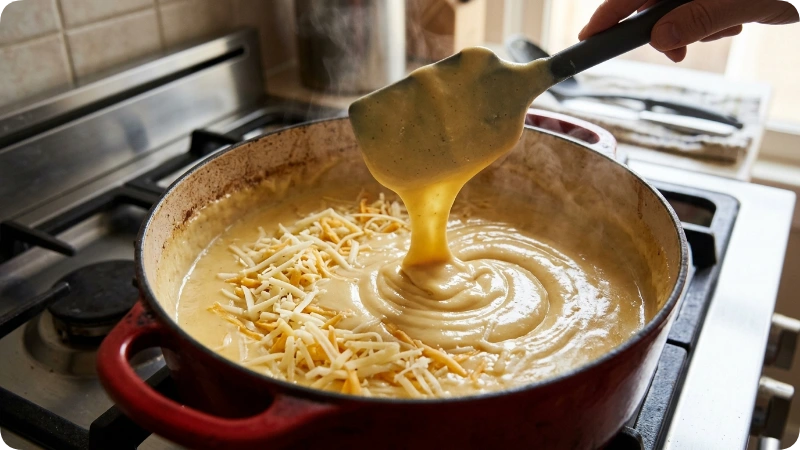
Remove the pot completely from the heat source. Allow the sauce to rest for 60 seconds so the temperature drops slightly below boiling (roughly 170°F to 180°F). Add Portion A of the cheese blend one handful at a time, whisking or stirring until each handful is fully melted and emulsified before adding the next. Stirring off heat prevents the milk proteins from seizing and curdling.
8. Combine Pasta and Mornay Sauce
Add the warm, drained cavatappi directly into the cheese sauce. Fold gently with a spatula until every piece of pasta is fully coated.
9. Layer the Dish
Pour half of the sauced pasta into the prepared 9×13-inch baking dish, spreading it into an even layer. Scatter half of Portion B (about 2.5 cups of cheese) evenly over the pasta. Top with the remaining sauced pasta, smoothing the surface. Finish by blanketing the top with the remaining cheese blend from Portion B.
10. Bake to Golden Perfection
Bake uncovered at 375°F (190°C) for 25 to 30 minutes, or until the edges are bubbling vigorously and the cheese on top has melted completely. If you prefer deeper color and blistered spots, switch the oven to high broil for the final 2 minutes. Watch the dish continuously under the broiler to prevent scorching.
11. Rest Before Slicing
Remove the baking dish from the oven and set it on a wire cooling rack. Allow the mac and cheese to rest undisturbed for 15 minutes before serving. This rest allows the starch and cheese emulsion to set, transforming runny sauce into a cohesive, sliceable, yet creamy texture.
Ingredient Notes and Functional Roles
- Block Cheese vs. Pre-Shredded: Shredding your own cheese is non-negotiable for this recipe. Pre-shredded bagged cheeses are coated with potato starch, powdered cellulose, and natamycin to prevent caking in the bag. These agents inhibit smooth melting, resulting in a grainy, chalky, or broken sauce.
- The Three-Cheese Blend:
- Sharp Cheddar: Provides primary acidic punch and sharp dairy depth to cut through heavy cream.
- Colby Jack: Acts as the primary melt-stabilizer; its high moisture content creates a silky body.
- Low-Moisture Mozzarella: Contributes mild creaminess and the distinct elastic cheese pull without adding excessive water.
- Evaporated Milk: More concentrated than whole milk, evaporated milk contains naturally concentrated milk protein micelles that act as an emulsifier, preventing the fat in the cheese and heavy cream from breaking into an oily pool during baking.
- Dijon Mustard: The acidity and natural lecithin in Dijon enhance savory notes while chemically stabilizing the fat-in-water emulsion of the mornay sauce. It does not make the finished dish taste like mustard.
- Cavatappi Pasta: The spiraled, ridged tubular shape holds up structurally under a heavy cheese sauce, capturing sauce both inside its hollow cavity and across its outer grooves better than standard smooth elbow macaroni.
Before You Begin: Mise en Place
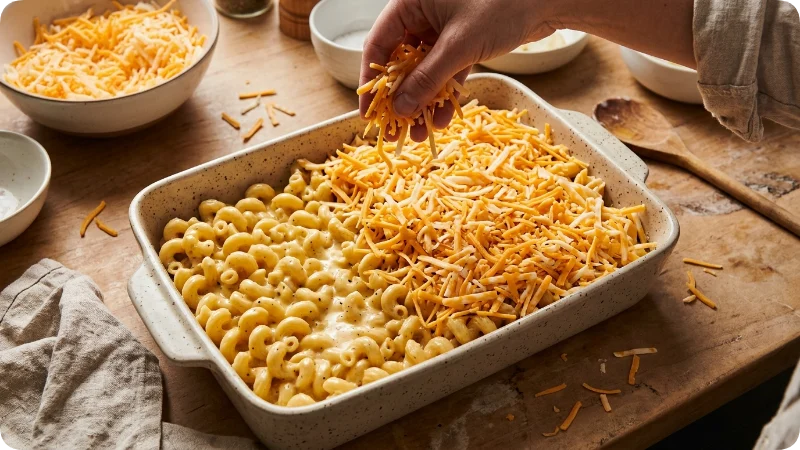
- Grate All Cheeses First: Do not start cooking your roux or pasta until your 40 ounces of cheese are completely shredded and divided. Once the mornay sauce begins, the process moves quickly and requires dedicated attention.
- Warm the Liquids: Measure out the heavy cream and evaporated milk 20 minutes early so they come to room temperature, or warm them briefly in a microwave until tepid. Pouring ice-cold liquid into a hot roux can shock the fats and create stubborn lumps.
- Check Pan Volume: Ensure your baking dish is a standard 9×13-inch pan with at least 2.5 to 3 inches of depth. A shallow casserole dish will bubble over during baking.
Critical Checkpoints for Success
Nailing the Pasta Texture
Cavatappi must be deliberately undercooked on the stovetop. Because it bakes submerged in hot, liquid mornay sauce for 30 minutes, pasta boiled to full tenderness will absorb additional moisture and turn mushy. Pull the pasta when there is still a thin white ring or firm resistance in the center of the noodle.
Emulsion Control
The primary failure point in scratch baked mac and cheese is a broken, grainy sauce. This happens when the cheese is subjected to direct, intense heat, which denatures the proteins and expels the butterfat as grease. Always pull your roux base off the stove burner before incorporating the cheese, and stir gently until smooth.
Troubleshooting Guide
| Problem | Likely Cause | Prevention | Can It Be Fixed? |
| Sauce is gritty, separated, or oily | Cheese was added over direct heat, or pre-shredded cheese with anti-caking agents was used. | Always melt cheese off heat in residual warmth; hand-shred whole blocks. | Partially: Whisking in 2 to 3 tablespoons of warm evaporated milk off heat can sometimes restore a lightly separated sauce before baking. Once baked, it cannot be reversed. |
| Pasta is soft and mushy | Pasta was fully boiled to al dente or beyond before baking. | Boil 2 full minutes less than package directions (7–8 minutes maximum). | No: Mushy pasta cannot regain structure once baked. |
| Mac and cheese is runny upon serving | Dish was cut into immediately out of the oven without resting. | Allow the casserole to rest for a full 15 minutes on the counter. | Yes: Let the dish sit at room temperature; it will firm up naturally as the temperature drops. |
| Cheese crust burns before interior is hot | Oven rack was too high, or oven runs hotter than calibrated. | Position the rack in the center third; tent loosely with aluminum foil if browning too rapidly. | Partially: Scrape away blackened spots and tent with foil for remaining bake time. |
Variations and Adaptations
- Crunchy Breadcrumb Topping (Untested Adaptation): If you prefer crunch over an all-cheese crust, melt 2 tablespoons of butter and toss with 1 cup of panko breadcrumbs and a pinch of paprika. Scatter this over the top layer of cheese during the final 10 minutes of baking.
- Smoked Meat Addition: Fold in 1 cup of finely diced, fully cooked smoked bacon or crisped andouille sausage along with the pasta into the warm cheese sauce.
- Herb Infusion: Whisk 1 teaspoon of fresh minced thyme or 1/4 teaspoon of freshly grated nutmeg into the mornay sauce alongside the Dijon mustard for a traditional French culinary note.
Make-Ahead, Storage, and Reheating
- Make-Ahead (Unbaked): Assemble the casserole completely through Step 9, but do not bake. Allow it to cool completely, cover tightly with plastic wrap and foil, and refrigerate for up to 24 hours. When ready to bake, remove the dish from the refrigerator 45 minutes prior to baking to take the chill off, then bake as directed (adding 5 to 10 minutes if still cool to the touch).
- Refrigeration: Store leftover baked mac and cheese in an airtight container for up to 4 days.
- Reheating: Reheating baked mac and cheese in a standard microwave often causes the cheese oils to separate. For the best texture, place portions in an oven-safe dish, splash with 1 to 2 tablespoons of milk or cream to restore moisture, cover with foil, and warm in a 325°F (165°C) oven for 15 to 20 minutes until heated through.
- Freezing: Freezing fully assembled or baked mac and cheese is not recommended. Heavy cream and high-fat cheese sauces tend to split and turn mealy upon thawing and reheating.
FAQs
Can I use elbow macaroni instead of cavatappi?
Yes. Standard large elbow macaroni can be substituted 1:1 by weight (16 oz). Reduce the stovetop boiling time to 5 to 6 minutes, ensuring the elbows remain firm so they do not collapse in the oven.
Why does Tini’s recipe use evaporated milk instead of regular milk?
Evaporated milk has roughly 60% of its water removed, concentrating its protein content. These proteins act as natural stabilizers that help bind the fat molecules from the heavy cream and cheeses, resulting in a rich, silky texture that resists separating under high oven heat.
Can I substitute pre-shredded bagged cheese to save prep time?
It is strongly discouraged. Bagged shredded cheeses contain anti-caking additives like cellulose that prevent smooth melting. Using them will result in a grainy, dull sauce with grease pooling on top.
Is this recipe spicy because of the cayenne pepper?
No. The 1/4 teaspoon of cayenne pepper provides background warmth and cuts through the intense richness of the dairy without imparting noticeable heat. It can be omitted if you are sensitive to spice.
Can I make this mac and cheese on the stovetop only?
Yes. If you prefer a loose, ultra-gooey stovetop style, cook the cavatappi to full al dente tenderness (about 9 to 10 minutes). Make the mornay sauce as directed using all the cheese (Portions A and B), fold in the drained pasta, stir over low heat until thick and glossy, and serve immediately without baking.
Summary
This comprehensive culinary guide breaks down the viral Tini mac and cheese recipe, originally developed by culinary creator Tini Younger. Centered on a full pound of ridged cavatappi pasta, the dish relies on an emulsion-stable mornay sauce constructed from a blonde butter-flour roux, heavy cream, evaporated milk, and Dijon mustard.
A balanced blend of freshly grated sharp cheddar, Colby Jack, and low-moisture mozzarella delivers sharpness, melting stability, and an elastic cheese pull without the risk of graininess caused by bagged cheeses.

Leo Campbell is the founder, recipe developer, and culinary voice behind Recipe Morsil. With nearly a decade of hands-on home cooking and professional baking experience, Leo tests every recipe multiple times to ensure reliable, fail-proof results in real home kitchens. When he’s not fine-tuning spices or testing cook times, he’s helping home cooks build confidence one bite at a time.
Connect with Leo via [Instagram/Email] or explore his verified recipes below.