Testing Status Note: This recipe applies established cooking science to create crisp chicken wings in a standard oven. It has not undergone formal testing in our private kitchen.
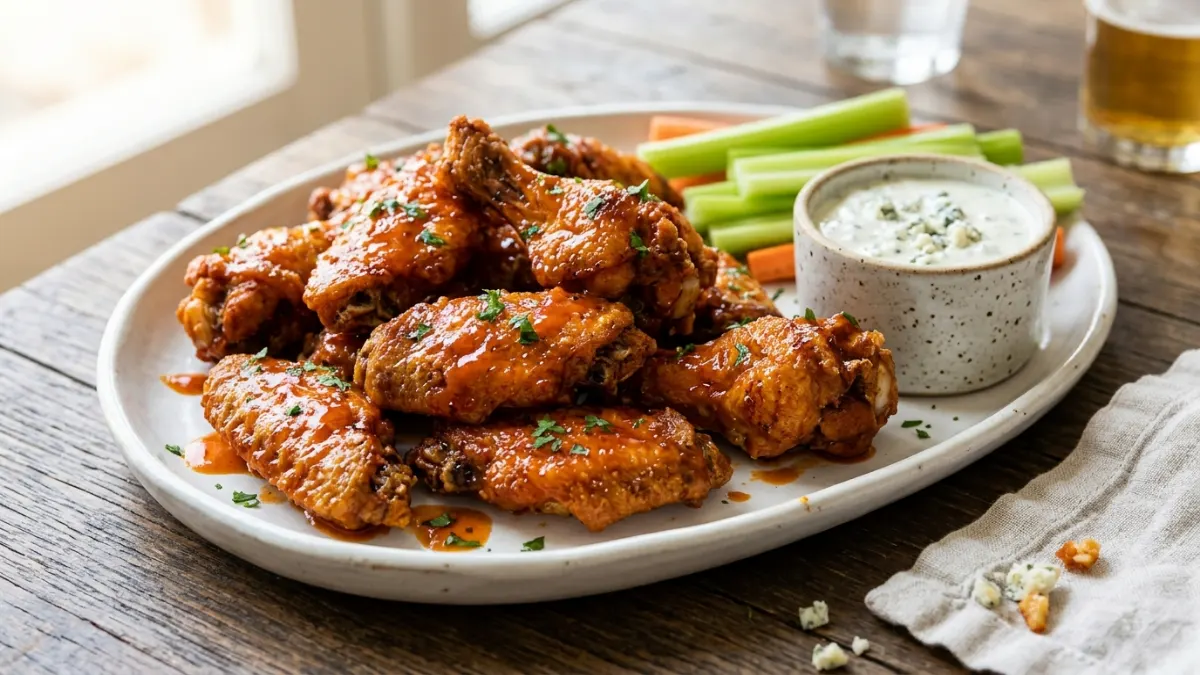
You do not need a commercial deep fryer or pots of boiling oil to achieve exceptional chicken wings. This oven method uses a dependable food science technique to draw out surface moisture and create tiny skin blisters. The result is wings with a crackling, crunchy exterior and juicy meat inside. Tossed in a balanced, buttery buffalo glaze, these wings deliver classic restaurant flavor straight from your home kitchen.
Ingredients and Equipment
- Yield: 4 servings (approximately 24 wing sections / 6 pieces per serving)
- Prep Time: 15 minutes
- Drying Time: 8 hours (or up to 24 hours)
- Bake Time: 45 to 50 minutes
- Total Elapsed Time: 9 hours 5 minutes
- Essential Equipment: Rimmed baking sheet, stainless steel wire cooling rack, paper towels, large mixing bowl, small saucepan, digital meat thermometer.
The Wings
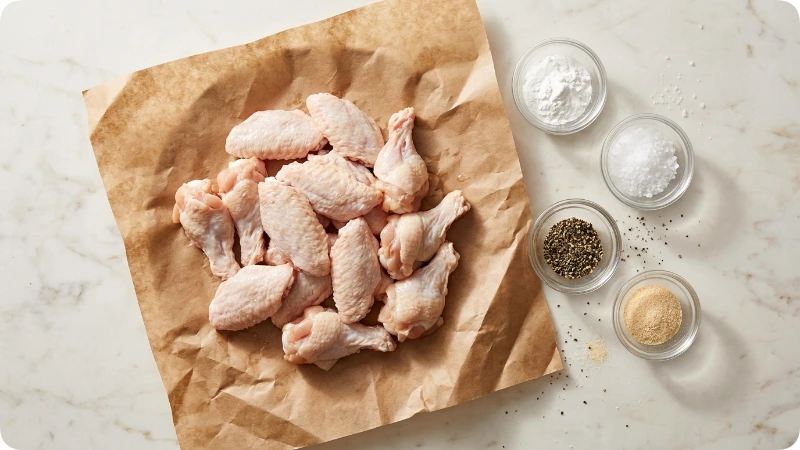
- 3 pounds chicken wings, split into drumettes and flats, wingtips removed
- 1 tablespoon aluminum-free baking powder (never use baking soda)
- 1 teaspoon fine sea salt
- 1/2 teaspoon ground black pepper
- 1/2 teaspoon garlic powder
The Classic Buffalo Glaze
- 1/3 cup cayenne hot sauce (such as Frank’s RedHot)
- 4 tablespoons unsalted butter, cut into small cubes
- 1 tablespoon honey or light brown sugar
- 1/2 teaspoon Worcestershire sauce
Step-by-Step Instructions
- Dry the chicken thoroughly: Blot each wing piece with paper towels until completely dry to the touch. Removing excess surface water prevents steaming and allows the skin to crisp.
- Apply the coating: In a large bowl, whisk together the aluminum-free baking powder, salt, black pepper, and garlic powder. Add the dried wings and toss until every piece has an even, powdery coating.
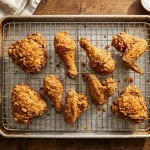
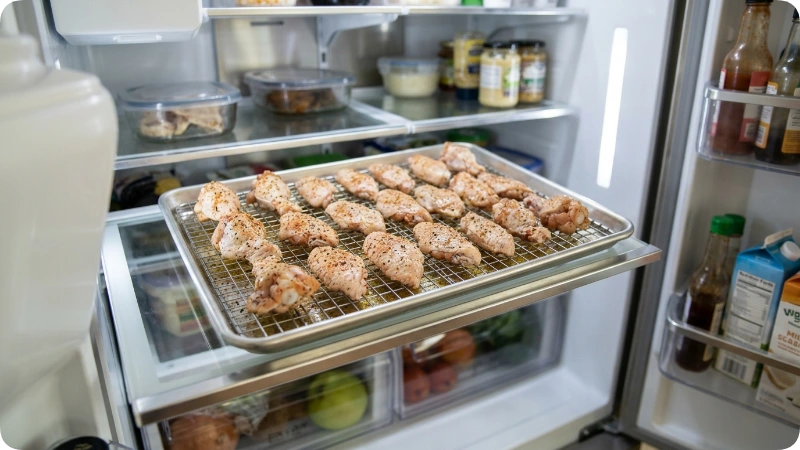
- Chill uncovered: Set an oven-safe wire cooling rack directly inside a rimmed baking sheet. Arrange the seasoned wings across the rack in a single layer so they do not touch. Place the baking sheet in your refrigerator, uncovered, for 8 to 24 hours to dehydrate the skin.
- Preheat the oven: Position an oven rack in the center position and preheat to 425°F (218°C). Line the bottom of the pan beneath the rack with aluminum foil if you wish to catch rendered fat.
- Roast to a crisp: Place the sheet pan into the hot oven. Bake for 20 minutes, flip each wing using tongs, and continue baking for another 25 to 30 minutes. The wings are ready when the skin is blistered and golden brown, and an instant-read thermometer registers at least 165°F (74°C). Aiming for 175°F to 185°F (79°C to 85°C) yields the most tender texture.
- Whisk the sauce: While the wings finish baking, combine the hot sauce, butter cubes, honey, and Worcestershire sauce in a small saucepan over low heat. Whisk steadily until the butter melts and forms a smooth, glossy sauce. Remove from the heat.
- Toss and serve: Place the hot wings into a large mixing bowl. Pour the warm buffalo sauce over the top and toss gently until well coated. Serve immediately.
Ingredient Notes and Substitutions
- Baking Powder vs. Baking Soda: Use exclusively aluminum-free baking powder. Never substitute baking soda, which creates a harsh, metallic flavor and burns rapidly at roasting temperatures. Baking powder raises the surface pH of the skin, accelerating fat rendering and forming crisp micro-blisters.
- Selecting Wings: Purchase pre-split party wings containing flats and drumettes. If using whole wings, slice through the two cartilage joints with a sharp knife to separate the drumette, flat, and tip. Reserve the wingtips in the freezer for homemade chicken broth.
- Hot Sauce Base: Choose an aged cayenne pepper sauce with moderate thickness. Avoid thick commercial barbecue sauces or thin vinegar sauces as direct substitutes; sugary sauces burn quickly, while excessive vinegar can cause the butter emulsion to break.
Before You Begin: The Importance of Dry Brining
Surface moisture is the primary barrier to crisp roasted poultry. Fresh chicken skin naturally retains water, which converts into steam when heated, preventing crisp browning.
Follow this preparation timeline for optimal texture:
- Morning Preparation: Pat the wings dry, toss them in the baking powder mixture, and arrange them on the wire rack.
- Refrigeration Period: Keep the wings uncovered on the bottom shelf of your refrigerator for 8 to 24 hours. Cold, circulating air evaporates skin moisture while the salt penetrates the meat to season it throughout.
- Same-Day Alternative: If time is limited, let the seasoned wings sit uncovered at room temperature for 45 to 60 minutes. While less crisp than the overnight method, thoroughly blotting the skin still yields good results.
How to Make Crispy Baked Wings
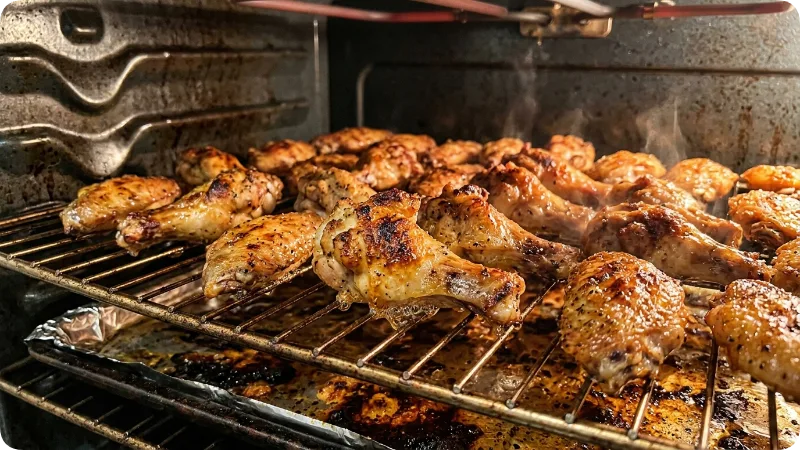
Executing this recipe successfully requires proper airflow, pan spacing, and heat control:
- Use an Elevated Wire Rack: Baking wings directly on a flat pan causes them to pool in rendered grease and steam. Elevating the wings on a wire rack allows hot air to circulate underneath, crisping the bottom as effectively as the top.
- Maintain Spacing: Leave at least half an inch of clearance between each wing piece. Overcrowding traps escaping moisture, creating humidity that softens the skin. Divide the batch between two pans if necessary.
- Target Optimal Internal Temperatures: While poultry is safe to consume at 165°F (74°C), chicken wings contain significant connective tissue and fat. Roasting until the meat reaches 175°F to 185°F (79°C to 85°C) melts collagen, ensuring tender meat that pulls away easily from the bone.
Tips and Troubleshooting
- Problem: The skin turns out soft or leathery instead of crisp.
- Cause: Trapped moisture on the chicken or insufficient oven temperature.
- Prevention: Dry the wings thoroughly with paper towels, permit adequate refrigerator drying time, and verify the oven temperature with an internal oven thermometer.
- Safe Fix: Adjust the oven setting to high broil for 2 to 3 minutes, monitoring closely to prevent burning.
- Problem: A bitter, unpleasant aftertaste.
- Cause: Accidental use of baking soda or baking powder containing sodium aluminum sulfate.
- Prevention: Verify that the packaging explicitly reads “aluminum-free baking powder.”
- Safe Fix: This issue cannot be undone after cooking, though tossing the wings in a sweet honey barbecue sauce can help mask the mineral flavor.
- Problem: The sauce splits into an oily pool.
- Cause: Excessive cooking heat or adding chilled butter too rapidly.
- Prevention: Melt the butter gently over low heat while whisking constantly.
- Safe Fix: Remove the saucepan from the stove and whisk in one teaspoon of warm water until the sauce smooths out.
Variations and Alternative Cooking Methods
- Convection Oven or Air Fryer: Convection airflow speeds up the crisping process. For a convection oven, lower the temperature to 400°F (204°C) and bake for 35 to 40 minutes. In an air fryer, cook the wings in a single layer at 380°F (193°C) for 20 minutes, flip, and finish at 400°F (204°C) for 5 minutes.
- Garlic Parmesan Style: Omit the cayenne hot sauce glaze. Melt 4 tablespoons of unsalted butter with 3 cloves of minced fresh garlic over low heat for 2 minutes. Toss the hot roasted wings in the garlic butter, then dust with 1/2 cup of freshly grated parmesan cheese and chopped fresh parsley.
- Dry Rub Option: For seasoned dry wings, mix 1 teaspoon of smoked paprika and 1/2 teaspoon of onion powder directly into the initial baking powder mixture. Omit the butter glaze entirely and serve dipping sauces on the side.
Serving Suggestions
- Traditional Accompaniments: Pair these rich, spicy wings with chilled celery and carrot sticks to provide a refreshing, crunchy contrast.
- Dipping Sauces: Serve alongside blue cheese dressing or creamy buttermilk ranch dip.
- Sauce Yield: This sauce recipe yields approximately 1/2 cup of glaze, which thoroughly coats 3 pounds of cooked wings. Double the glaze ingredients using the same low-heat method if your guests prefer extra sauce for dipping.
Make-Ahead, Storage, and Reheating
- Make-Ahead: You can season the raw wings and place them on the wire rack in the refrigerator up to 24 hours ahead of baking.
- Refrigeration: Store leftover cooked wings in an airtight container in the refrigerator for up to 4 days.
- Freezing: Arrange baked, unsauced wings on a sheet pan until frozen solid, then transfer them to an airtight freezer bag for up to 2 months. Thaw completely in the refrigerator before reheating.
- Reheating Instructions: Avoid using a microwave, which softens the skin and leaves it chewy. Reheat wings on a wire rack inside a baking sheet at 375°F (190°C) for 10 to 12 minutes until heated through and crisp again.
FAQs
Can I prepare these wings without baking powder?
Yes, but the skin will lack the distinct bubbly crunch characteristic of deep-fried wings. If omitting the powder, extend the uncovered refrigeration time to a full 24 hours so circulating air dries the skin as thoroughly as possible.
Why do the chicken wings stick to the wire rack?
Lean poultry skin naturally adheres to dry metal before fat begins rendering. Lightly brush or spray the wire cooling rack with a neutral cooking oil, such as canola or avocado oil, before arranging the chicken pieces.
Can I bake frozen chicken wings using this method?
No. Frozen wings release excessive moisture as they defrost in the oven, diluting the seasoning and causing the meat to steam. Always thaw frozen wings completely in the refrigerator and blot dry before coating.
Will the finished wings taste like baking powder?
No. One tablespoon of aluminum-free baking powder distributed across three pounds of chicken falls well below the taste threshold, leaving no detectable flavor once baked and sauced.
What is the most reliable way to check doneness?
Insert a digital instant-read thermometer into the thickest section of several wings without touching the bone. While 165°F (74°C) is food-safe, cooking wings to 175°F–185°F (79°C–85°C) yields the most tender texture.
Article Summary
This cooking guide presents a reliable oven-baked method for making crispy chicken wings without a deep fryer. The approach relies on food science: tossing raw wings in a light mixture of salt and aluminum-free baking powder.
This powder slightly alters the surface pH of the chicken skin, helping fats render efficiently while producing microscopic blisters that closely replicate traditional hot-oil frying.

Leo Campbell is the founder, recipe developer, and culinary voice behind Recipe Morsil. With nearly a decade of hands-on home cooking and professional baking experience, Leo tests every recipe multiple times to ensure reliable, fail-proof results in real home kitchens. When he’s not fine-tuning spices or testing cook times, he’s helping home cooks build confidence one bite at a time.
Connect with Leo via [Instagram/Email] or explore his verified recipes below.