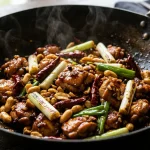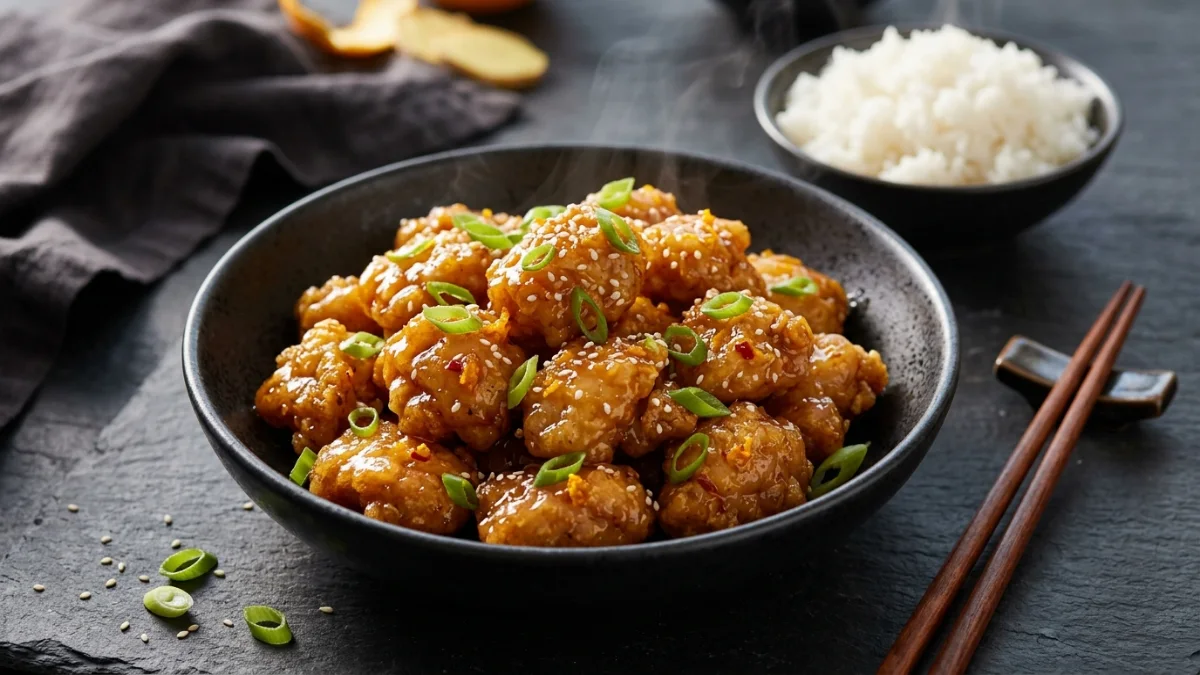
This easy orange chicken recipe delivers crisp, golden bites of tender chicken tossed in a glossy, sweet-and-tangy citrus glaze flavored with fresh orange zest, garlic, and ginger. Designed for home kitchens, it bypasses the mess and oil volume of deep-frying by using a shallow skillet pan-fry and a simple cornstarch dredge. In under 40 minutes, you achieve Chinese-American takeout flavor with clean pantry ingredients and minimal cleanup.
Recipe Testing Disclosure: This recipe is an untested editorial proposal structured on established culinary ratios for starch dredged pan-frying and cornstarch-thickened glazes. While verified for technical safety and sequence, it has not undergone formal multi-trial kitchen testing for this exact publication.
Recipe Card: Easy Skillet Orange Chicken
Crisp cornstarch-dredged chicken thigh bites tossed in a vibrant stovetop sauce made with real orange juice, zest, soy sauce, and aromatics.
- Prep Time: 15 minutes
- Cook Time: 20 minutes
- Inactive Time: 0 minutes
- Total Elapsed Time: 35 minutes
- Yield: Approximately 4 cups cooked chicken and glaze
- Portions: 4 main-course servings (approx. 1 cup each)
- Essential Equipment:
- 10- or 12-inch large skillet (cast iron, stainless steel, or heavy nonstick)
- 2-quart saucepan (for sauce reduction)
- Whisk, tongs, digital instant-read thermometer
- Rimmed baking sheet fitted with a wire cooling rack
Ingredients
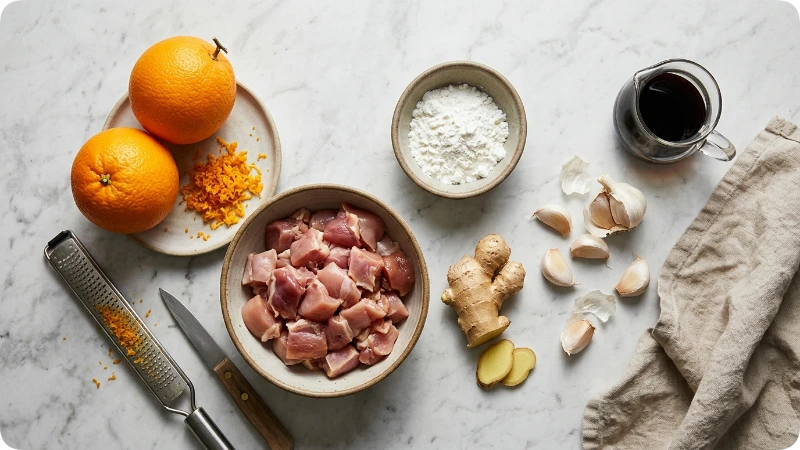
The Chicken Dredge:
- 1.5 pounds (680 g) boneless, skinless chicken thighs (or chicken breasts), trimmed of excess fat and cut into 1-inch bite-sized pieces
- 1 large egg, lightly beaten
- 1 tablespoon low-sodium soy sauce
- 1/2 teaspoon kosher salt
- 1/4 teaspoon freshly ground black pepper
- 1/2 cup (64 g) cornstarch
- 1/3 cup (80 ml) high-smoke-point cooking oil (such as vegetable, canola, or peanut oil), for shallow frying
For the Fresh Orange Glaze:
- 1 tablespoon finely grated orange zest (from approx. 1 large navel orange)
- 1/2 cup (120 ml) fresh orange juice (strained, from 1 to 2 large navel oranges)
- 3 tablespoons low-sodium soy sauce
- 3 tablespoons granulated sugar
- 2 tablespoons packed light brown sugar
- 2 tablespoons unseasoned rice vinegar
- 2 cloves garlic, finely minced (approx. 2 teaspoons)
- 1 teaspoon fresh ginger, finely grated
- 1/4 teaspoon crushed red pepper flakes (optional, for mild heat)
- 1 tablespoon cornstarch dissolved in 2 tablespoons cold water (cornstarch slurry)
For Garnish and Serving (Optional):
- 2 scallions (green onions), thinly sliced
- 1 teaspoon toasted sesame seeds
- Steamed jasmine or white rice, for serving
Instructions
Prep & Dredge the Chicken
- Season and Coat the Chicken: In a medium mixing bowl, whisk together the beaten egg, 1 tablespoon soy sauce, 1/2 teaspoon kosher salt, and 1/4 teaspoon black pepper. Add the cut chicken pieces and toss until every piece is coated. Let sit at room temperature for 5 minutes. Place 1/2 cup cornstarch into a shallow bowl or pie dish. Working in batches, lift several chicken pieces from the egg mixture, allowing excess liquid to drip off, and dredge thoroughly in the cornstarch, pressing gently so the starch adheres and creates an even, powdery coating. Shake off excess starch and arrange coated pieces on a clean plate in a single layer.
Prepare the Glaze
- Whisk the Sauce Base: In a separate 2-quart saucepan off the heat, whisk together the orange zest, fresh orange juice, 3 tablespoons low-sodium soy sauce, granulated sugar, brown sugar, rice vinegar, minced garlic, grated ginger, and crushed red pepper flakes (if using). In a small ramekin, stir 1 tablespoon cornstarch into 2 tablespoons cold water until fully dissolved to create your slurry; set the slurry aside near the stove.
Cook & Crisp
- Shallow-Fry the Chicken in Batches: Add 1/3 cup cooking oil to your large skillet and set it over medium-high heat. Heat the oil until shimmering, registering 350°F to 365°F (175°C to 185°C) on an instant-read thermometer. Carefully add half of the chicken pieces in a single layer, ensuring pieces do not touch or crowd the pan. Fry undisturbed for 3 to 4 minutes until the bottom crust is light golden and crisp. Use tongs to flip each piece and cook the second side for another 2 to 3 minutes, until the chicken reaches a minimum internal temperature of 165°F (74°C) measured with a digital thermometer. Transfer the cooked chicken to a wire rack set over a rimmed baking sheet to keep the crust crisp. Repeat with the remaining chicken batch.
- Simmer and Thicken the Orange Glaze: While the second batch of chicken is frying (or immediately after), place the saucepan containing the orange juice mixture over medium heat. Bring to a gentle boil, stirring occasionally to dissolve the sugars (approx. 2 minutes). Restir your prepared cornstarch slurry to recombine, then pour it into the boiling sauce while whisking continuously. Reduce heat to medium-low and simmer for 1 to 2 minutes, whisking constantly, until the sauce turns clear, glossy, and thickens enough to coat the back of a spoon. Remove from heat immediately.
Combine & Serve
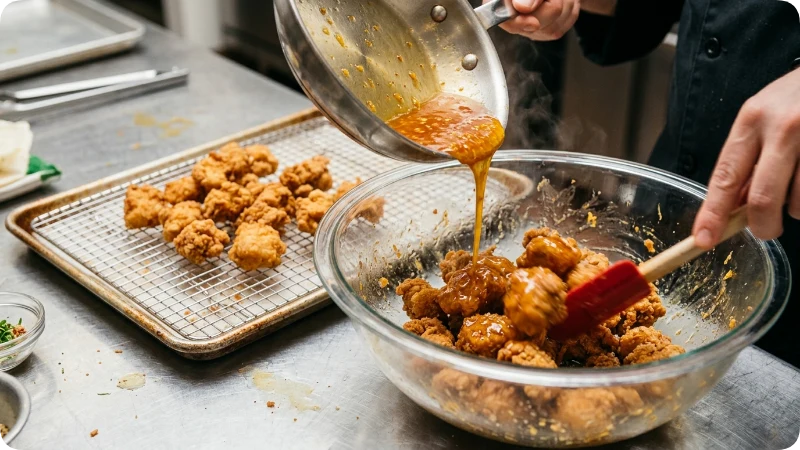
- Toss and Finish: Transfer the hot, crispy chicken directly into a large heat-safe mixing bowl (or directly into the skillet if the oil has been safely drained). Pour the warm orange sauce over the chicken. Use a rubber spatula to gently fold and toss the chicken until every piece is evenly coated in the shiny glaze.
- Garnish and Serve: Transfer immediately to a serving platter or shallow bowls over warm steamed rice. Sprinkle with sliced scallions and toasted sesame seeds. Serve hot.
Before You Begin: Prep Timeline and Setup
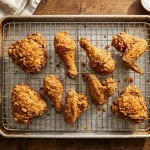
- Set Up the Cooling Station: Place a wire cooling rack inside a rimmed baking sheet before you begin heating oil. Draining fried chicken on paper towels traps escaping steam beneath the chicken, instantly making the bottom crust soggy. A wire rack allows air to circulate around each piece.
- Prep All Aromatics Ahead: The sauce thickens within 60 to 90 seconds of adding the slurry. Have garlic minced, ginger grated, and the slurry mixed before frying the chicken.
- Safety Checklist: Ensure oil does not exceed 375°F (190°C). Use dry utensils and shake off heavy loose starch before placing chicken in hot oil to prevent excessive foaming and spattering.
How to Make It: Key Technique Checkpoints
Managing starch hydration and glaze viscosity ensures your chicken stays crunchy under a thick coating:
[Egg + Soy Seasoning Bath] ──> [Press Firmly into Dry Cornstarch]
│
▼
[Shallow Fry at 350°F-365°F] ──> [Flip Once: Crisp & 165°F Internal]
│
▼
[Drain on Elevated Wire Rack] ──> [Simmer Sauce + Whisk in Slurry]
│
▼
[TOSS IMMEDIATELY BEFORE SERVING] ──> [Garnish and Plate Hot]
- The Starch Barrier: Shaking off excess cornstarch prevents loose powder from dropping into the hot oil, where it would burn, turn bitter, and cloud subsequent batches.
- Batch Frying Discipline: Adding all the chicken at once drastically drops the pan temperature. When oil temperature dips below 325°F (163°C), the chicken absorbs oil rather than crisping, leading to greasy meat. Fry in two separated batches.
- Tossing Sequence: Never simmer the fried chicken inside the sauce pan. Always pour the sauce over the resting crispy chicken and toss quickly just prior to plating. This minimizes contact time between hot liquid and starch, preserving the crunch.
Tips and Troubleshooting
- Problem: The chicken coating turns gummy or falls off.
- Cause: The chicken was wet before dredging, or the pieces were moved too quickly after entering the oil.
- Prevention: Drain the chicken pieces slightly before dredging, press the cornstarch firmly onto the meat, and let the chicken sit undisturbed for the first 3 minutes of frying until the crust sets.
- Problem: The glaze is too thick or resembles jelly.
- Cause: The cornstarch slurry was overcooked or boiled too long after thickening.
- Safe Fix: Whisk in 1 to 2 tablespoons of warm water or extra orange juice off the heat until the sauce loosens to a glossy pourable state.
- Problem: The sauce tastes unpleasantly bitter.
- Cause: The white inner pith of the orange was grated along with the colored orange zest.
- Prevention: Use a microplane or fine zester with light pressure, taking only the topmost colored layer of the orange peel.
Variations and Add-Ins
- Air Fryer Method: Preheat air fryer to 400°F (200°C). Lightly spray the basket with cooking oil. Place dredged chicken pieces in a single layer, leaving space between them. Spray the tops generously with cooking oil spray to hydrate the dry starch. Air fry for 10 to 12 minutes, shaking the basket halfway through, until internal temperature reaches 165°F (74°C). Toss with warm sauce.
- Spicy Szechuan-Style: Increase crushed red pepper flakes to 1 teaspoon and add 4 to 6 whole dried red chilies directly to the sauce saucepan while simmering the aromatics.
- Veggie Stir-In: Sauté 1 cup of bell pepper chunks and 1 cup of broccoli florets in 1 tablespoon of oil for 3 minutes until crisp-tender; fold into the chicken and sauce mixture during the final toss.
Serving Suggestions
Serve over hot steamed jasmine, long-grain white, or brown rice to catch the sweet citrus glaze. For a balanced meal, pair with steamed snap peas, garlic-sautéed bok choy, or vegetable spring rolls. If serving family-style, transfer the sauced chicken to a warm platter immediately, keeping extra sauce in a small side bowl for diners who prefer dipping.
Storage, Freezing, and Reheating
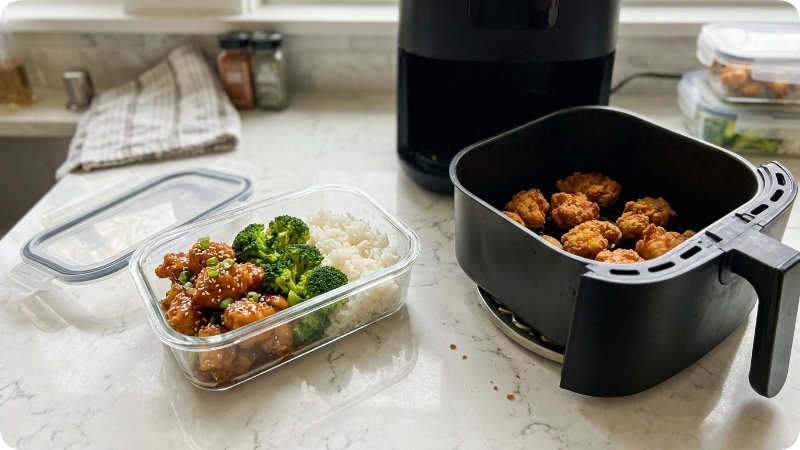
- Refrigeration: Store leftover sauced chicken in an airtight container for up to 3 to 4 days at or below 40°F (4°C). Note that the cornstarch crust will soften in the refrigerator as it absorbs sauce moisture.
- Reheating: Avoid the microwave, which turns the coating soft and rubbery. Reheat leftovers on a baking sheet in a 375°F (190°C) toaster oven or conventional oven for 8 to 10 minutes, or in an air fryer at 350°F (175°C) for 4 to 5 minutes, until heated through to an internal temperature of 165°F (74°C).
- Freezing Components: For best meal-prep quality, freeze the fried chicken bites and the sauce separately. Freeze fully cooked, cooled chicken pieces on a baking sheet, then transfer to a freezer bag for up to 2 months. Reheat frozen chicken in an oven at 400°F (200°C) for 12 to 15 minutes until sizzling, warm the thawed sauce separately on the stove, and toss fresh.
FAQs
Can I use chicken breast instead of chicken thighs?
Yes. Chicken breast works well. Trim and dice into uniform 1-inch cubes. Keep frying time to approximately 3 minutes on the first side and 2 minutes on the second side to prevent the leaner breast meat from drying out.
How do I get the chicken extra crispy?
A double-fry method adds extra crunch. Fry the chicken batches once at 350°F for 3 minutes total until just pale and cooked through. Rest on the rack for 5 minutes, raise oil temperature to 375°F, and fry all pieces a second time for 60 to 90 seconds until deep golden.
Can I use store-bought orange marmalade for the sauce?
You can make a quick shortcut glaze using 1/2 cup orange marmalade melted with 2 tablespoons soy sauce, 1 tablespoon rice vinegar, and 1 teaspoon grated ginger. However, the resulting sauce will be significantly sweeter and thicker than this fresh-juice recipe.
Why is my oil foaming while frying?
Oil foams when excess moisture or loose, unhydrated starch enters the hot fat, or when the cooking oil is deteriorating from overheating. Sift loose cornstarch from the chicken before dropping it into the oil, and monitor your burner to keep the oil within the 350°F–365°F range.
Recipe Article Summary
This culinary guide provides a straightforward home technique for making an easy orange chicken recipe without requiring a commercial deep fryer. Built around tender boneless chicken thighs cut into uniform bite-sized pieces, the method utilizes an egg and soy marinade followed by a pure cornstarch dredge.
When pan-fried in shallow oil at 350°F to 365°F, this starch coating creates a crisp, light exterior that seals in moisture while reaching the safe minimum internal temperature of 165°F. The accompanying glaze is prepared on the stovetop using freshly squeezed orange juice, finely grated zest, low-sodium soy sauce, garlic, ginger, and a light brown sugar balance, quickly thickened with a standard cornstarch slurry into a shiny coating.

Leo Campbell is the founder, recipe developer, and culinary voice behind Recipe Morsil. With nearly a decade of hands-on home cooking and professional baking experience, Leo tests every recipe multiple times to ensure reliable, fail-proof results in real home kitchens. When he’s not fine-tuning spices or testing cook times, he’s helping home cooks build confidence one bite at a time.
Connect with Leo via [Instagram/Email] or explore his verified recipes below.