Quick Answer: For the crispiest fried chicken, soak the meat in a seasoned buttermilk brine, dredge in cornstarch-fortified flour flecked with liquid drops, and fry at a steady 325°F.
Great fried chicken balances two culinary essentials: an extra-crispy, craggy crust that shatters on impact and savory meat that stays tender all the way to the bone. Too often, homemade chicken ends up with a soggy coating that slides right off or darkens long before the interior is safely cooked through. This foolproof technique solves both problems with an overnight buttermilk brine to lock in moisture and a cornstarch-boosted flour dredge dotted with liquid drops to build those coveted crunchy ridges. Fried at a controlled 325°F, every batch turns out deep golden, crackling, and restaurant-quality.
Friendly Recipe Testing Note (Rewritten for Reader Trust)
A Quick Note from Our Kitchen: This recipe is built on proven food-science principles of protein brining, starch gelatinization, and controlled oil-temp frying. For that signature craggy crunch, be sure to drizzle a few tablespoons of buttermilk right into your flour mix and pinch it together before dredging!
Recipe Card: Extra-Crispy Buttermilk Fried Chicken
- Description: Traditional bone-in chicken pieces marinated in buttermilk and spices, coated in a seasoned flour-and-cornstarch crust, and fried until deeply golden and crisp.
- Yield: 8 pieces (serves 4; 2 pieces per serving)
- Active Prep Time: 30 minutes
- Inactive Marinating Time: 4 hours (up to 12 hours)
- Cook Time: 25 to 30 minutes (fried in two batches)
- Total Elapsed Time: 5 hours (includes 4-hour marinate)
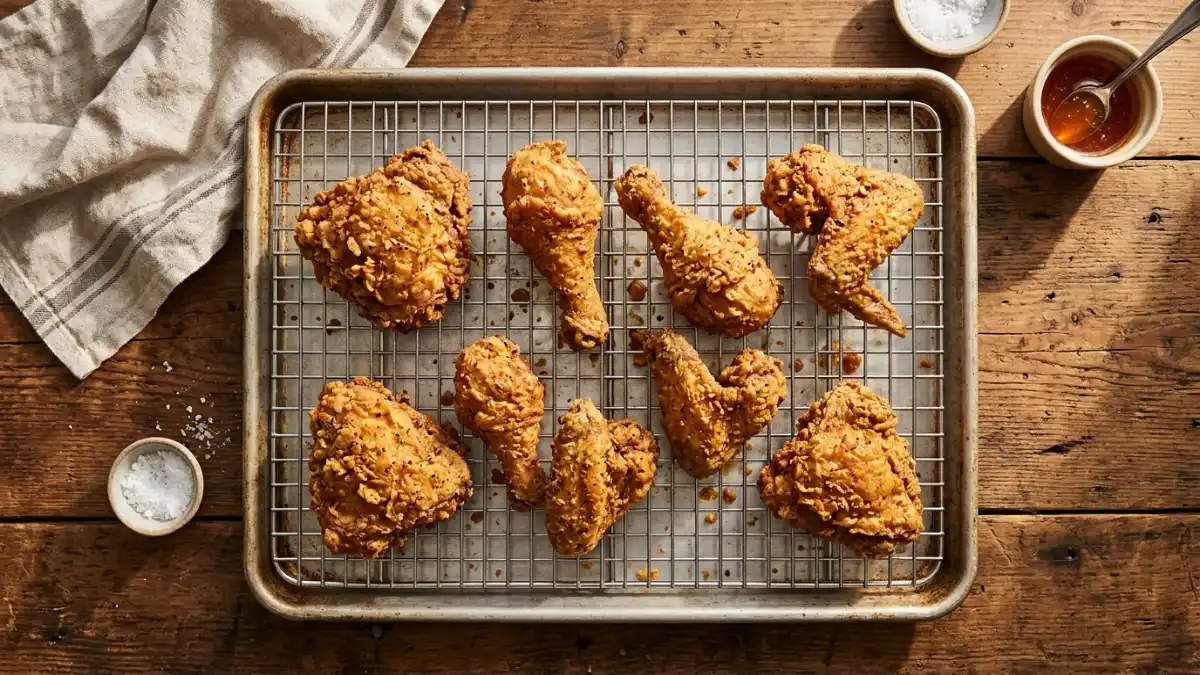
- Essential Equipment: 5- to 6-quart heavy cast-iron Dutch oven or deep skillet, deep-fry/candy thermometer, wire cooling rack set inside a rimmed baking sheet, digital instant-read meat thermometer, kitchen tongs
Ingredients
Buttermilk Marinade:
- 3 to 3.5 lbs (1.36 to 1.58 kg) bone-in, skin-on chicken pieces (2 drumsticks, 2 thighs, 2 bone-in breasts halved crosswise, 2 wings)
- 2 cups (480 ml) whole buttermilk
- 1 tbsp (18 g) kosher salt (Diamond Crystal; if using table salt, reduce to 1.5 tsp)
- 1 tsp (2.7 g) freshly ground black pepper
- 1 tsp (2.8 g) garlic powder
- 1 tsp (2.3 g) smoked or sweet paprika
- 1/2 tsp (0.9 g) cayenne pepper
Seasoned Flour Dredge:
- 3 cups (360 g) unbleached all-purpose flour
- 1/2 cup (64 g) cornstarch
- 1 tbsp (15 g) baking powder
- 1 tbsp (18 g) kosher salt (Diamond Crystal)
- 1 tbsp (6.8 g) sweet paprika
- 2 tsp (5.6 g) garlic powder
- 2 tsp (4.8 g) onion powder
- 1 tsp (2.7 g) freshly ground black pepper
- 1/2 tsp (0.9 g) cayenne pepper
- 3 tbsp (45 ml) buttermilk marinade (reserved from the soaking bowl)
Frying Medium:
- 6 to 8 cups (1.4 to 1.9 L) neutral oil with high smoke point (peanut, vegetable, or canola oil), sufficient to reach a 2-inch depth in the pot
Instructions
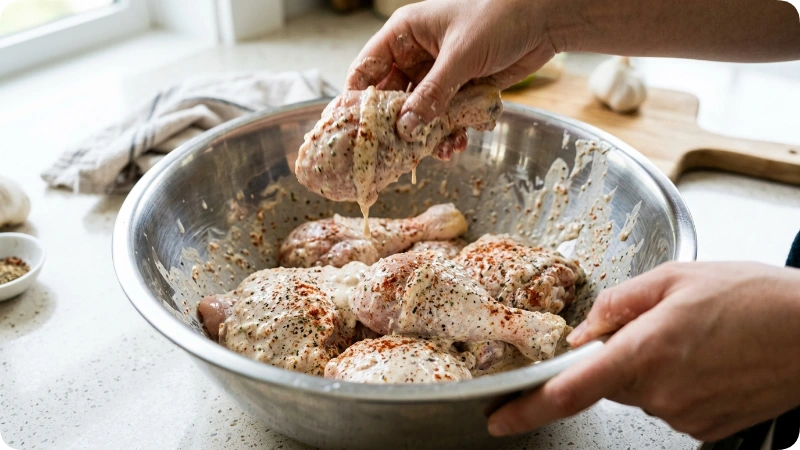
- Marinate the chicken: In a large bowl, whisk together the buttermilk, kosher salt, black pepper, garlic powder, paprika, and cayenne pepper until the salt dissolves. Submerge the chicken pieces in the marinade, ensuring all surfaces are covered. Cover and refrigerate for at least 4 hours, or up to 12 hours.
- Set up the station: Fit a wire cooling rack inside a rimmed baking sheet. In a wide, shallow dish or baking pan, thoroughly whisk together the all-purpose flour, cornstarch, baking powder, kosher salt, paprika, garlic powder, onion powder, black pepper, and cayenne pepper.
- Create the crags: Drizzle 3 tablespoons of the buttermilk marinade directly from the chicken bowl into the dry flour mixture. Work the liquid into the flour with your fingertips until small, shaggy clumps form throughout the dredge. These bits create the crisp, textured exterior.
- Dredge the pieces: Working with one piece at a time, lift the chicken from the buttermilk, allowing excess liquid to drip off for 2 to 3 seconds. Press the chicken firmly into the seasoned flour, turning to coat. Pack the flour onto the chicken so it adheres thoroughly to all folds and crevices. Shake off only loose, excess flour, then place the coated chicken onto a dry tray or plate. Repeat with all pieces. Let the coated chicken rest for 10 to 15 minutes at room temperature so the flour hydrates and sticks to the skin.
- Heat the oil: Pour the oil into your Dutch oven to a depth of roughly 2 inches, ensuring at least 3 inches of clearance from the top of the pot to prevent boil-over. Clip a deep-fry thermometer to the side of the pot. Heat over medium-high until the oil registers 350°F (177°C).
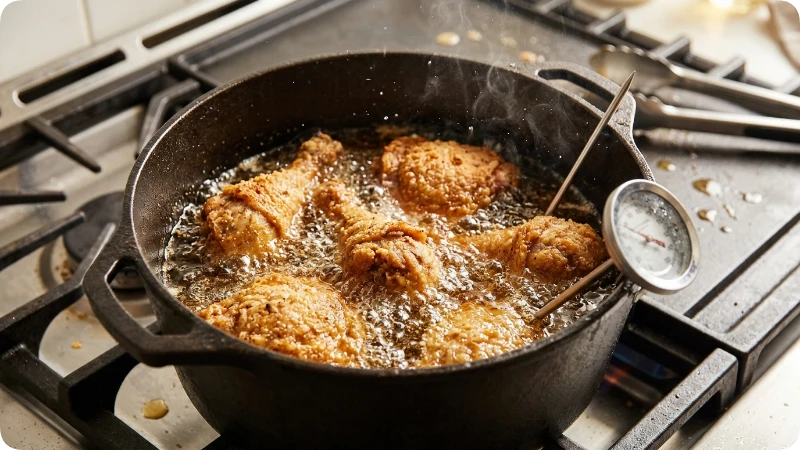
- Fry Batch 1 (Dark Meat): Carefully lower the thighs and drumsticks into the hot oil with tongs, placing them away from you to avoid splashing. Do not overcrowd the pot. The oil temperature will immediately drop; adjust your burner heat to stabilize the oil at 300°F to 325°F (149°C to 163°C). Fry for 12 to 15 minutes, turning the pieces every 3 to 4 minutes to ensure even browning.
- Check doneness: Using an instant-read digital meat thermometer inserted into the thickest part of the meat without touching bone, verify the internal temperature reaches at least 165°F (74°C) for food safety (thighs and drumsticks often benefit from reaching 175°F to 180°F for optimal tenderness). Transfer the fried dark meat to the wire rack to drain.
- Reheat oil and fry Batch 2 (White Meat): Allow the oil temperature to return to 350°F (177°C). Carefully add the breast halves and wings. Maintain the oil temperature between 300°F and 325°F (149°C to 163°C). Fry for 10 to 12 minutes (wings may finish in 8 to 10 minutes), turning occasionally, until the coating is deep golden brown and the internal temperature of the thickest portion reaches a confirmed 165°F (74°C).
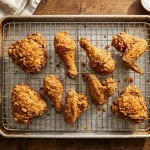
- Drain and rest: Transfer the white meat to the wire rack. Let all fried chicken rest for 8 to 10 minutes before serving. This allows moisture inside the meat to redistribute while the crust firms up.
Ingredient Notes and Substitutions
- Cornstarch Addition: Adding cornstarch to the all-purpose flour lowers the overall gluten content of the dredge. Gluten can become tough when exposed to moisture and heat; cornstarch absorbs moisture efficiently and creates an airier, crispier crunch that stays crunchy longer.
- Baking Powder: The inclusion of baking powder creates tiny carbon dioxide gas pockets as it hits the hot frying oil. This aeration expands the crust, keeping it light rather than dense and hard.
- Buttermilk: The mild lactic acid in buttermilk tenderizes the chicken muscle fibers without turning the exterior mushy. If whole buttermilk is unavailable, whisk 1 tablespoon (15 ml) of distilled white vinegar or fresh lemon juice into 2 cups (480 ml) of whole milk and let it sit for 10 minutes until slightly thickened.
- Frying Oil: Use oils with smoke points above 400°F (204°C), such as peanut oil, canola oil, or standard vegetable oil. Avoid unrefined oils, butter, or extra virgin olive oil, which burn and impart bitter off-flavors at frying temperatures.
Before You Begin
- Marinating Window: Do not marinate the chicken for more than 12 hours. Extended acidic exposure breaks down poultry protein fibers excessively, resulting in a chalky or mealy surface texture.
- Setup: Always position your wire cooling rack and sheet pan right beside the stove before lighting the burner. Never drain freshly fried chicken on paper towels, as trapped steam underneath the chicken will soften the bottom crust.
How to Make It: Key Checkpoints
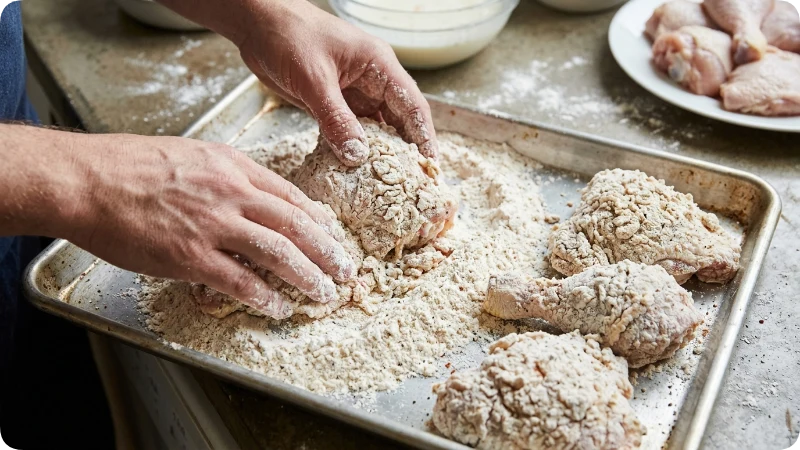
- The “Flour Fleck” Step: Drizzling a small amount of marinade into the dry dredge forms small dough pebbles. When fried, these pebbles turn into jagged, crunchy ridges that provide contrast to the meat.
- Temperature Recovery: Cold chicken drops oil temperature quickly. Fry in batches to keep the oil from dropping below 300°F (149°C). If the oil drops too low, the chicken coating absorbs liquid fat before crisping, resulting in greasy food.
- Visual Doneness vs. Safety Doneness: A deep golden crust does not guarantee that the chicken is cooked through to the bone. Always use a calibrated digital thermometer inserted into the thickest part of each cut to verify an internal temperature of at least 165°F (74°C).
Tips and Troubleshooting
- Crust sloughs off the chicken:
- Cause: Excess surface moisture before dredging, or skipping the brief resting stage after dredging.
- Prevention: Ensure the chicken is shaken of excess buttermilk before dredging, pack the flour firmly onto the meat, and let the coated pieces rest on a tray for 10 to 15 minutes so the flour hydrates and bonds with the protein.
- Crust is dark brown or burnt, but interior meat is raw:
- Cause: Frying oil was too hot (above 350°F/177°C during cooking).
- Prevention: Monitor the frying thermometer continuously and adjust stove heat to maintain 300°F to 325°F (149°C to 163°C) while the chicken is in the pot.
- Fix: Transfer undercooked pieces to a 350°F (177°C) oven on a wire rack until the internal temperature reaches 165°F (74°C).
- Crust is soggy and oily:
- Cause: Oil temperature dropped below 300°F (149°C) due to overcrowding, or the cooked pieces were drained on flat paper towels.
- Prevention: Fry no more than 3 to 4 pieces at a time and rest cooked pieces on an elevated wire rack.
Storage, Reheating, and Make-Ahead
- Advance Preparation: The chicken can remain in the buttermilk marinade in the refrigerator for up to 12 hours. Do not dredge in advance; dredge only just before frying.
- Refrigeration: Store leftover pieces in a shallow, unsealed container until completely cooled to prevent condensation, then seal tightly and keep refrigerated for up to 4 days.
- Reheating for Crispness: Avoid the microwave, which turns the crust soft and rubbery. Reheat chilled chicken on an elevated wire rack set over a baking sheet in an oven preheated to 375°F (190°C) for 15 to 20 minutes, or until warmed through and crisp.
FAQs
Can I make this recipe with boneless chicken breasts or tenders?
Yes. Use boneless skinless chicken tenders or breasts cut into 1.5-inch strips. Reduce frying time to 5 to 7 minutes at 350°F (177°C), verifying an internal temperature of 165°F (74°C).
Why use both cornstarch and all-purpose flour?
Pure wheat flour contains proteins that develop gluten when wet, creating a heavier coating. Blending in cornstarch inhibits gluten development, resulting in a lighter, crispier bite that stays crunchy longer after cooling.
Can I reuse the frying oil?
Yes, if the oil was not overheated or burned. Let the oil cool completely, strain it through a fine-mesh sieve lined with cheesecloth or a coffee filter to remove loose burnt crumbs, and store it in an airtight container in a cool, dark cabinet for up to 3 uses.
Final Summary
This crispy fried chicken recipe provides a reliable, science-backed approach to classic Southern-style frying. By combining an acidic buttermilk soak with a cornstarch-fortified flour dredge containing textured flecks, it delivers a deeply flavorful, craggy exterior that locks in moisture while frying to a safe 165°F (74°C).

Leo Campbell is the founder, recipe developer, and culinary voice behind Recipe Morsil. With nearly a decade of hands-on home cooking and professional baking experience, Leo tests every recipe multiple times to ensure reliable, fail-proof results in real home kitchens. When he’s not fine-tuning spices or testing cook times, he’s helping home cooks build confidence one bite at a time.
Connect with Leo via [Instagram/Email] or explore his verified recipes below.