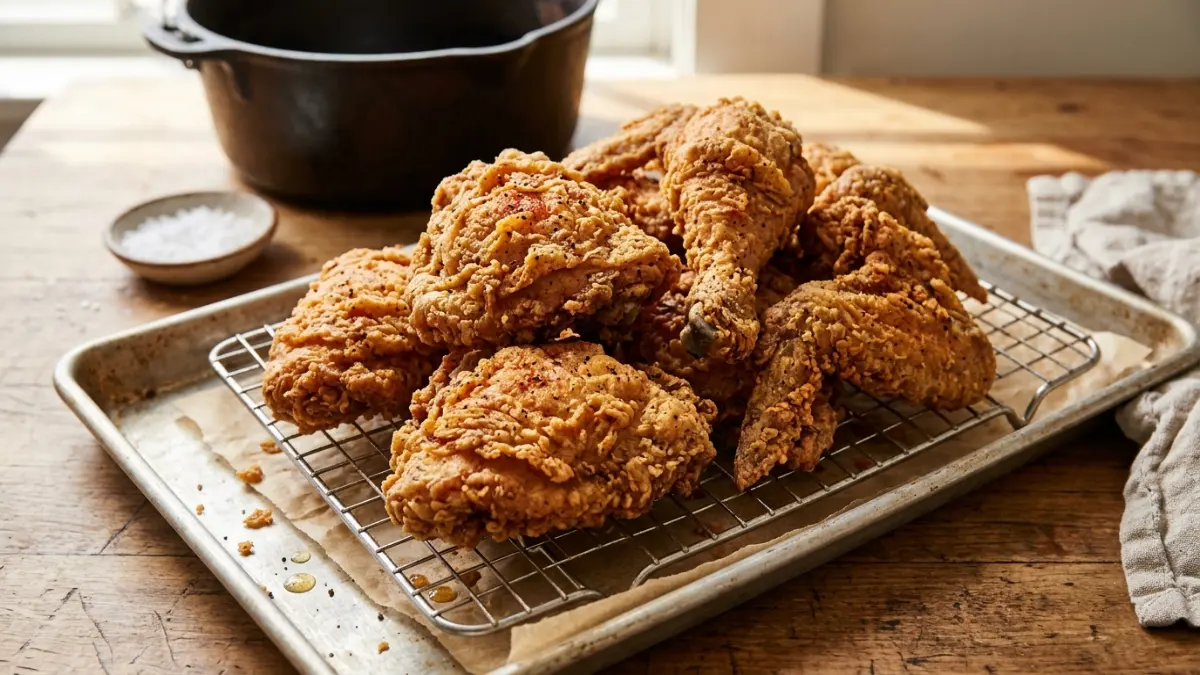
Quick Answer: Soak bone-in chicken in seasoned buttermilk, double-dredge in spiced flour with drizzled buttermilk flecks, and fry at 350°F until golden brown and registering 165°F.
Classic Southern buttermilk fried chicken is the gold standard of comfort food: a shatteringly crisp, craggy crust giving way to deeply seasoned, fall-apart juicy meat. The secret lies in a tangy buttermilk soak that tenderizes the poultry while locking in moisture, paired with a spiced flour dredge engineered to form crunchy, irregular ridges. Fried to deep golden perfection right on your stovetop, this foolproof method bypasses the need for commercial fryers and delivers authentic, restaurant-quality crunch straight to your dinner table.
A Quick Note from Our Kitchen: This recipe is built on foundational meat-tenderizing science, high-yield starch dredge ratios, and USDA poultry safety benchmarks. To keep your coating crunchy and intact, let your breaded chicken rest on a wire rack for 10 minutes before frying so the crust adheres cleanly!
Buttermilk Fried Chicken
A classic bone-in fried chicken featuring a 24-hour tenderizing buttermilk soak and an extra-craggy, double-dredged crust.
- Yield: 8 pieces
- Servings: 4 servings (2 pieces per serving)
- Prep Time: 25 minutes
- Inactive Marinating Time: 4 hours (up to 12 hours)
- Cook Time: 30 minutes
- Total Elapsed Time: 4 hours 55 minutes
- Essential Equipment: Heavy 5- to 6-quart enameled Dutch oven or deep cast-iron chicken fryer; deep-fry or candy thermometer; instant-read meat thermometer; wire cooling rack set inside a rimmed baking sheet; spider skimmer or metal tongs.
Ingredients
Buttermilk Marinade
- 3.5 to 4 lbs bone-in, skin-on chicken pieces (2 drumsticks, 2 thighs, 2 bone-in breasts cut crosswise into halves)
- 2 cups (480 ml) whole buttermilk
- 1 tablespoon (15 ml) hot sauce (standard cayenne-vinegar style)
- 1 tablespoon (9 g) kosher salt (Diamond Crystal; if using Morton’s, use 1½ teaspoons / 9 g)
- 1 teaspoon (2.5 g) freshly cracked black pepper
- 1 teaspoon (2.7 g) garlic powder
- 1 teaspoon (2.7 g) smoked or sweet paprika
Seasoned Dredge
- 2½ cups (300 g) all-purpose flour
- ½ cup (64 g) cornstarch
- 1 tablespoon (9 g) kosher salt
- 1 tablespoon (7 g) smoked or sweet paprika
- 2 teaspoons (5.4 g) garlic powder
- 2 teaspoons (4.6 g) onion powder
- 1 teaspoon (2.3 g) cayenne pepper
- 1 teaspoon (2.5 g) freshly cracked black pepper
- 1 teaspoon (4 g) baking powder
- 3 tablespoons of the prepared buttermilk marinade (reserved from the marinade bowl)
Frying Medium
- 6 to 8 cups (1.4 to 1.9 L) peanut oil, vegetable oil, or canola oil (sufficient to maintain 1½ to 2 inches depth in the pot)
Instructions
Step 1: Prep and Dredging
- Season and Marinate the Chicken:In a large mixing bowl, whisk together the buttermilk, hot sauce, 1 tablespoon kosher salt, 1 teaspoon black pepper, 1 teaspoon garlic powder, and 1 teaspoon paprika until the salt is fully dissolved. Submerge the chicken pieces in the marinade, ensuring every piece is coated. Cover and refrigerate for at least 4 hours, or up to 12 hours. Do not exceed 24 hours.
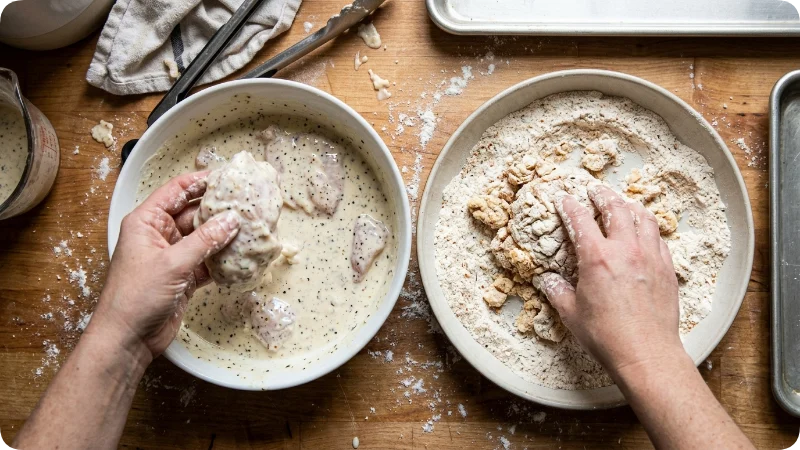
- Prepare the Dredge:In a wide, shallow bowl or rimmed baking dish, whisk together the all-purpose flour, cornstarch, 1 tablespoon kosher salt, paprika, garlic powder, onion powder, cayenne pepper, black pepper, and baking powder. Drizzle 3 tablespoons of the liquid buttermilk marinade into the flour mixture and toss with a fork or your fingers to create small, shaggy clumps.
- Dredge and Rest:Set a rimmed sheet pan lined with parchment or foil next to your workstation. Working with one piece at a time, lift the chicken from the marinade, letting excess liquid drip back into the bowl for 2 to 3 seconds. Press the chicken firmly into the seasoned flour mixture, turning to coat every crevice. Dip the chicken back into the buttermilk bowl briefly (1 second), then return it to the flour for a second coating, pressing firmly so the shaggy bits adhere. Place the coated chicken on the prepared sheet pan. Repeat for all pieces. Let the coated chicken sit at room temperature for 15 to 20 minutes to allow the flour to hydrate; this prevents the crust from sloughing off in the hot oil.
Step 2: Frying and Finishing
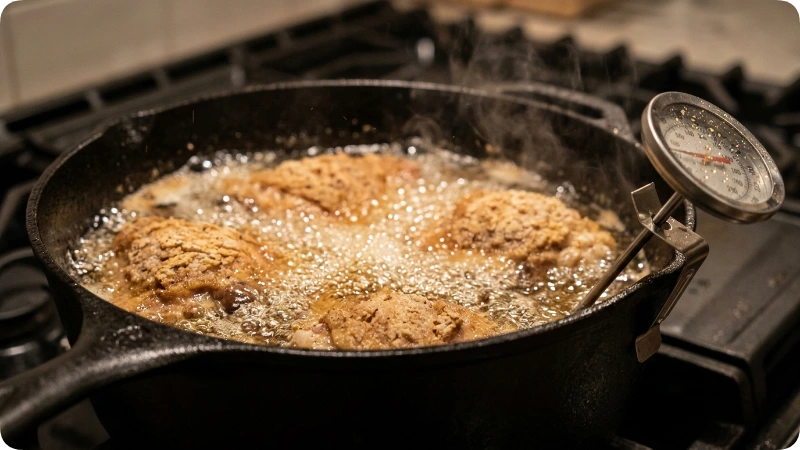
- Heat the Oil:Pour oil into your Dutch oven to a depth of roughly 1½ to 2 inches (ensuring there are at least 3 inches of clearance to the rim of the pot to prevent boil-overs). Clip a deep-fry thermometer to the side of the pot. Heat over medium-high until the oil reaches 365°F (185°C). Set a wire cooling rack inside a clean rimmed baking sheet nearby.
- Fry in Batches (Dark Meat First):Carefully lower 3 to 4 pieces of chicken (thighs and drumsticks first) into the hot oil, laying them in away from you to prevent splashing. The oil temperature will drop immediately; adjust the burner to maintain a steady frying temperature between 315°F and 325°F (157°C–163°C). Fry the dark meat for 12 to 14 minutes, turning pieces once halfway through with tongs or a spider skimmer, until the crust is deep golden-brown.
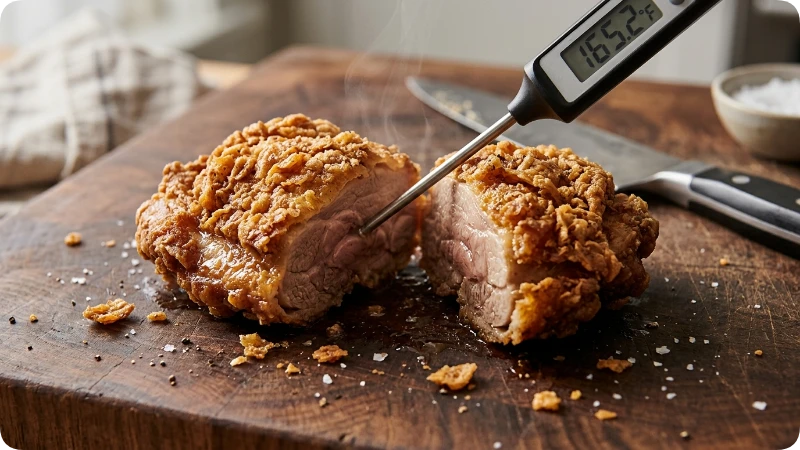
- Verify Doneness:Insert an instant-read probe thermometer into the thickest part of the meat without touching the bone. The internal temperature must register at least 165°F (74°C) for safe consumption (thighs can be taken to 175°F–180°F for optimal tenderness). Transfer cooked chicken to the wire rack to drain.
- Fry the White Meat:Allow the oil temperature to recover to 365°F (185°C). Add the breast pieces. Maintain the oil temperature between 315°F and 325°F. Fry for 10 to 12 minutes, turning once, until an instant-read thermometer registers 165°F (74°C) in the thickest part.
- Rest and Serve:Sprinkle lightly with a pinch of fine salt immediately after removing from the oil if desired. Let all chicken rest on the wire rack for 8 to 10 minutes before serving to allow juices to redistribute and the crust to fully crisp up.
Ingredient Notes and Substitutions
- Whole Buttermilk: The lactic acid in real buttermilk gently tenderizes meat fibers without turning them mushy, while its natural sugars promote browning. If whole buttermilk is unavailable, whisk 1¾ cups whole milk with ¼ cup plain whole-milk yogurt. Avoid vinegar-and-milk curdled substitutes for deep frying; they lack the body, emulsifiers, and coating adhesion of true cultured buttermilk.
- Cornstarch: Replacing roughly 15–20% of the flour with cornstarch lowers the overall gluten content of the dredge, preventing the crust from becoming tough or chewy and creating a crisper, more delicate shell.
- Baking Powder: The alkaline leavening reacts when hit by hot oil, producing microscopic carbon dioxide bubbles that aerate the coating for a lighter crunch.
- Frying Fat: Choose oils with neutral flavor profiles and high smoke points (above 400°F). Peanut oil provides clean flavor transfer and thermal stability. Canola, corn, or vegetable oil blends are reliable direct substitutes. Unrefined oils, butter, or extra virgin olive oil are unsuitable due to low burn points.
Before You Begin: The Timeline
- 4 to 12 Hours Ahead: Combine the chicken pieces and marinade in the refrigerator. Do not marinate longer than 12 to 14 hours; prolonged acid exposure degrades muscle structure, yielding a chalky texture.
- 45 Minutes Before Frying: Pull the chicken from the refrigerator, build your dredge station, and coat the pieces. The 15- to 20-minute rest after dredging is critical: moisture from the chicken activates the starch, creating a paste that binds the dry crust to the skin.
- 15 Minutes Before Frying: Set up your fry pot, clip on your thermometer, and preheat the oil slowly over medium heat. Arrange a wire rack over a baking sheet for draining—never drain fried chicken directly on paper towels, which trap steam and soften the bottom crust.
How to Make It: Critical Stages and Checkpoints
1. Clumping the Dredge
Flicking 3 tablespoons of buttermilk marinade directly into the dry seasoned flour before coating the chicken mimics commercial pressure-fried texture. These droplets hydrate small clusters of flour into crags that fry into ultra-crisp ridges.
2. Managing the Temperature Drop
When cold meat enters 365°F oil, the temperature can plunge 40°F to 50°F. Never crowd the pot: fry a maximum of 3 or 4 pieces at a time. Keep the heat set high initially, then dial it back once the oil stabilizes at 315°F–325°F. If oil drops below 300°F, the crust absorbs excess fat and turns greasy; if it spikes above 340°F, the exterior burns before the interior reaches 165°F.
3. Monitoring Doneness
Color is not an indicator of safety. Variations in paprika, buttermilk browning, and oil age cause crusts to brown at differing speeds. Always confirm doneness using a calibrated digital instant-read thermometer inserted into the center of the thickest portion, away from the bone.
Tips and Troubleshooting
- Crust Falls Off the Chicken
- Cause: The chicken skin was too wet, or the dredged chicken was dropped into the oil immediately without resting.
- Prevention: Allow the dredged chicken to rest on a tray for 15 to 20 minutes before frying so the starch hydrates and adheres. Avoid moving the chicken during the first 3 minutes of frying.
- Fix: Cannot be fixed once detached in the oil; handle pieces gently with tongs rather than piercing forks.
- Crust Is Dark Brown, but Meat Is Raw Inside
- Cause: Oil temperature was too hot (above 340°F during frying), or chicken was straight-from-the-fridge cold.
- Prevention: Monitor your thermometer continuously and maintain 315°F–325°F. Let coated chicken temper slightly on the counter for 15 minutes.
- Safe Fix: Transfer undercooked pieces to a 350°F (175°C) oven on a wire rack until the internal temperature registers 165°F.
- Soggy or Greasy Texture
- Cause: Oil dropped below 300°F due to overcrowding, or chicken was drained on flat paper towels.
- Prevention: Fry in small batches; allow the oil to recover to 365°F between batches; drain solely on an elevated wire cooling rack.
- Safe Fix: Re-crisp on a wire rack in a 400°F (204°C) oven for 5 to 8 minutes.
Make-Ahead, Storage, and Reheating
- Refrigerator Storage: Cool leftovers on a wire rack to room temperature (not exceeding 2 hours at ambient temperature per USDA food-safety limits). Transfer to an airtight container lined with a dry paper towel to catch residual moisture. Store for up to 3 to 4 days at or below 40°F (4°C).
- Freezing: Arrange fully cooled pieces in a single layer on a sheet tray until frozen solid (about 2 hours), then transfer to an airtight freezer-safe bag for up to 3 months. Thaw overnight in the refrigerator before reheating.
- Reheating for Crispness: Never microwave fried chicken, as it steams the crust. To reheat, preheat an oven to 375°F (190°C). Place chicken pieces on an elevated wire rack over a rimmed baking sheet. Bake until hot throughout and the skin crackles, roughly 12 to 15 minutes (or 8 to 10 minutes in a 360°F air fryer). Internal temperature should reach 165°F.
FAQs
Can I use boneless, skinless chicken breasts with this recipe?
Yes, but you must adjust the cooking time. Cut large breasts into uniform 4-ounce cutlets. Fry at 330°F–340°F for 6 to 8 minutes total until they reach 165°F inside. Monitor carefully, as lean boneless white meat dries out rapidly if overcooked.
Why is my fried chicken leaking blood or dark liquid near the bone?
Darkening around the bone is common in young commercial chickens. The porous bones allow bone marrow pigment to seep into surrounding meat during cooking and freezing. If the meat has reached a verified internal temperature of 165°F (74°C) on an instant-read thermometer, it is fully cooked and safe to eat.
Can I reuse the frying oil?
Yes, provided the oil did not smoke or burn. Allow the oil to cool completely, then strain it through a fine-mesh sieve lined with cheesecloth or a coffee filter into an airtight jar. Store in a cool, dark cabinet or the refrigerator. Used oil can typically be reused 2 to 3 times for frying poultry.
Can I make this in an air fryer?
This specific liquid-batter double-dredge formula is designed for oil submersion; loose dry flour blow-off will occur in standard convection air fryers without adequate oil saturation. For air frying, spray the dredged pieces thoroughly with oil until no dry flour spots remain, and cook at 375°F for 20 to 25 minutes, flipping halfway.
Article Summary
This guide delivers a classic buttermilk fried chicken recipe engineered for maximum crunch and tender meat using a 4- to 12-hour buttermilk soak, starch-fortified seasoned flour, and controlled stovetop deep frying. Complete with prep timelines, oil temperature troubleshooting, and food-safety checkpoints, it ensures consistent, restaurant-quality results at home.

Leo Campbell is the founder, recipe developer, and culinary voice behind Recipe Morsil. With nearly a decade of hands-on home cooking and professional baking experience, Leo tests every recipe multiple times to ensure reliable, fail-proof results in real home kitchens. When he’s not fine-tuning spices or testing cook times, he’s helping home cooks build confidence one bite at a time.
Connect with Leo via [Instagram/Email] or explore his verified recipes below.